Raspberry Pi Fan Driver (Part 1)
This post provides all information needed to get started with a custom embedded Linux driver on Raspberry Pi platform. In the end a minimal character driver would be written to create a solid starting point.
Part 1 (Fresh Start)
This part provides the basic initialization part for testing environment and driver’s code. The driver will not be dependent on Raspberry Pi OS and any software that comes with it, which allows to focus more on Linux and it’s structure in general.
The blog is not written by a professional, so there may be inaccuracies. Please verify the important information.
All steps were made on Ubuntu 20.04, which is a Linux distribution. Any other distribution will do, however compiling this on Windows is unlikely to be possible without any emulation or virtual machines. The same goes for Mac i suppose. Linux has a rich ecosystem of development tools, so it is handy to have an extra device running it or just using multiboot.
Presumptions
Drivers are made for hardware parts, which are usually unattached from the main board. Raspberry Pi is a great platform to learn embedded Linux, but when it comes to drivers, most of them are already handled in a BSP provided by vendor. Those hardware components are also too complex for starters.
So for those, ‘like me’, writing a simple driver for a component that only needs a power signal to work is a great starting point. This fan often comes in original packages of different RPis with a case, and it is usually just simply connected to GND and 5V pin or 3.3V pin, if it is too loud. The fact that it is just works from power pins and cannot be controlled in any way was also one of the reasons for this idea. After searching for available solutions there weren’t many straightforward solutions from the box, of course some software written specifically for Raspberry Pi OS would do the trick, but we are talking about a custom built embedded Linux. Writing such driver and a user-space software afterwards for controlling the fan could be a good practice and way to learn more.
Environment and Initialization
Before writing any code and making assumptions there must be some solid grounds for testing. In my case, it is a Raspberry Pi 4 B, however i suppose everything here should be working on any RPi, because Linux would handle hardware differences, and the features used in this driver would not be exclusive for this particular RPi.
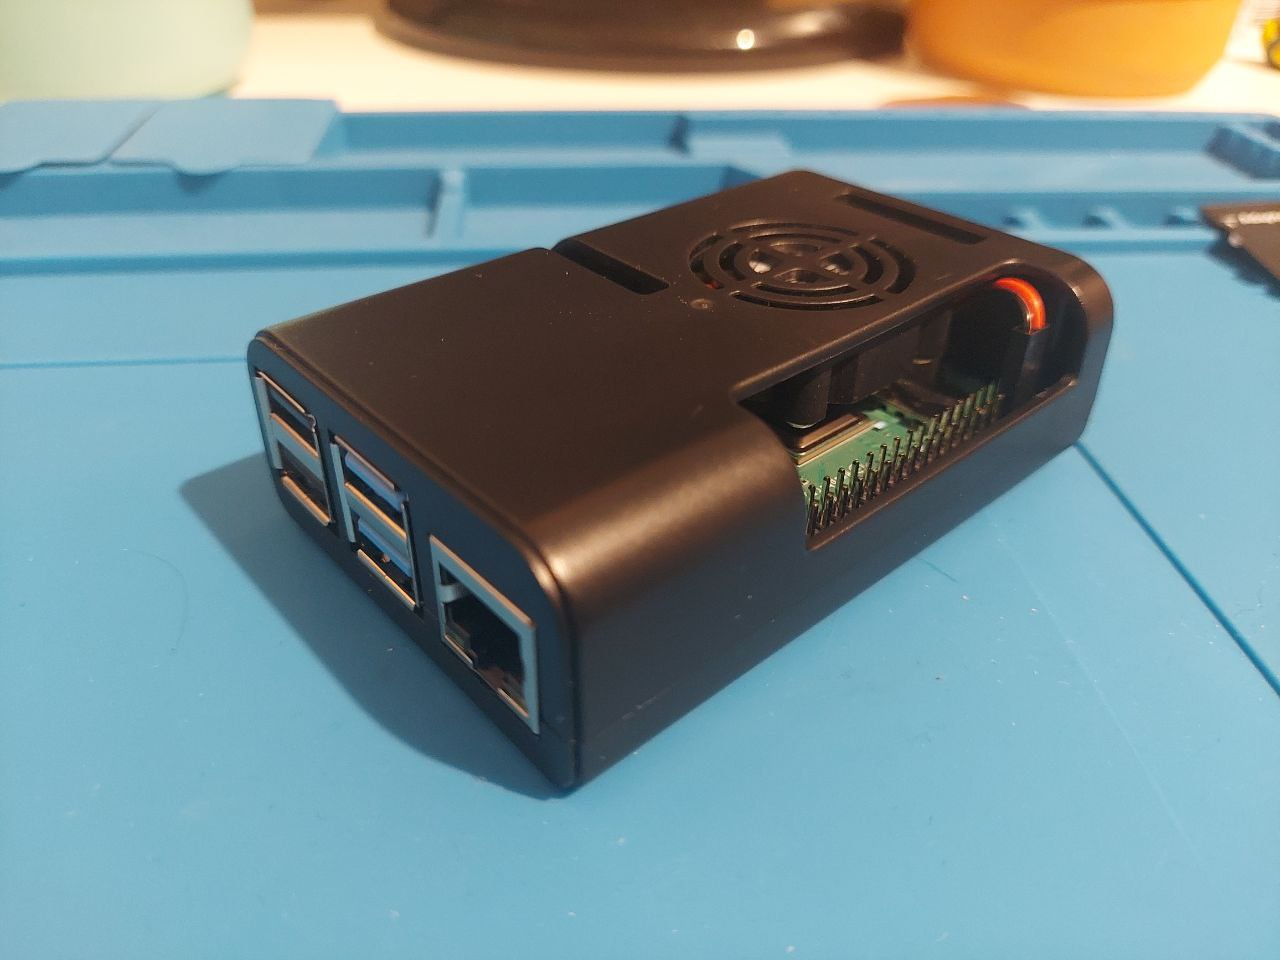 An image of Raspberry Pi 4 B
So in order to be independent1 of Raspberry Pi OS and it’s software, a custom compiled Linux shall be made. The driver would most likely to work on the official OS also, but custom OS allows for tweaking installed packages, changing the device-tree with custom overlays and adding our driver to the kernel tree.
Buildroot
Important to mention that the OS running on the platform is a kernel version: 6.1.61-v8, which is a default one provided just after using an available configs, with only some few tweaks to provide a
sshconnection support. This version is being used because it is a newer kernel, therefore there would be a legacy and a new way of handling GPIO pins and PWM on them.
Bitbake is an overkill for this, of course one may use it if they wish, but buildroot is enough for a testing environment to play around and it compiles quickly. It is very easy to use and has a solid amount of guides available anywhere, but for the sake of completion, all required commands and changes are included there.
- Clone
To get buildroot just clone it from the official repository:
1
git clone git@github.com:buildroot/buildroot.git
If something went wrong, it is probably useful to check out the official documentation for it’s requirements.
Next commands shall be executed inside the cloned buildroot folder.
- Applying the config we need
Firstly search from the configuration for yours RPi. They can be seen after the following command:
1
ls configs/ | grep raspberrypi
For me raspberrypi4_64_defconfig is a suitable one. It is a clean 64-bit Linux with minimal available commands and a command line interface. Config names already speak for themselves, but to be sure, sometimes it is useful to check out which platform you have in the documentation.
Buildroot is a set of Makefiles that automatise all hard work via simple commands. So to apply the config, a make {config_name} must be executed to apply the configuration. For me it’s:
1
make raspberrypi4_64_defconfig
- Little tweaks
I do not want to connect my RPi to a second monitor, because it is not really how it’s done with embedded devices and i do not wish to switch cables too often. So i would be adding dropbear package to enable ssh support. It allows to communicate with target device through Ethernet cable. If it is not necessary for you, and you wish to connect all your peripherals to RPi instead of controlling it from the laptop/PC, then this step may be skipped.
To add the dropbear package one can tweak the .config file, which consists all configuration flags and variables, but also use a GUI interface to add it there.
1
make menuconfig
Navigate to Target packages > Networking applications, find and select dropbear package.
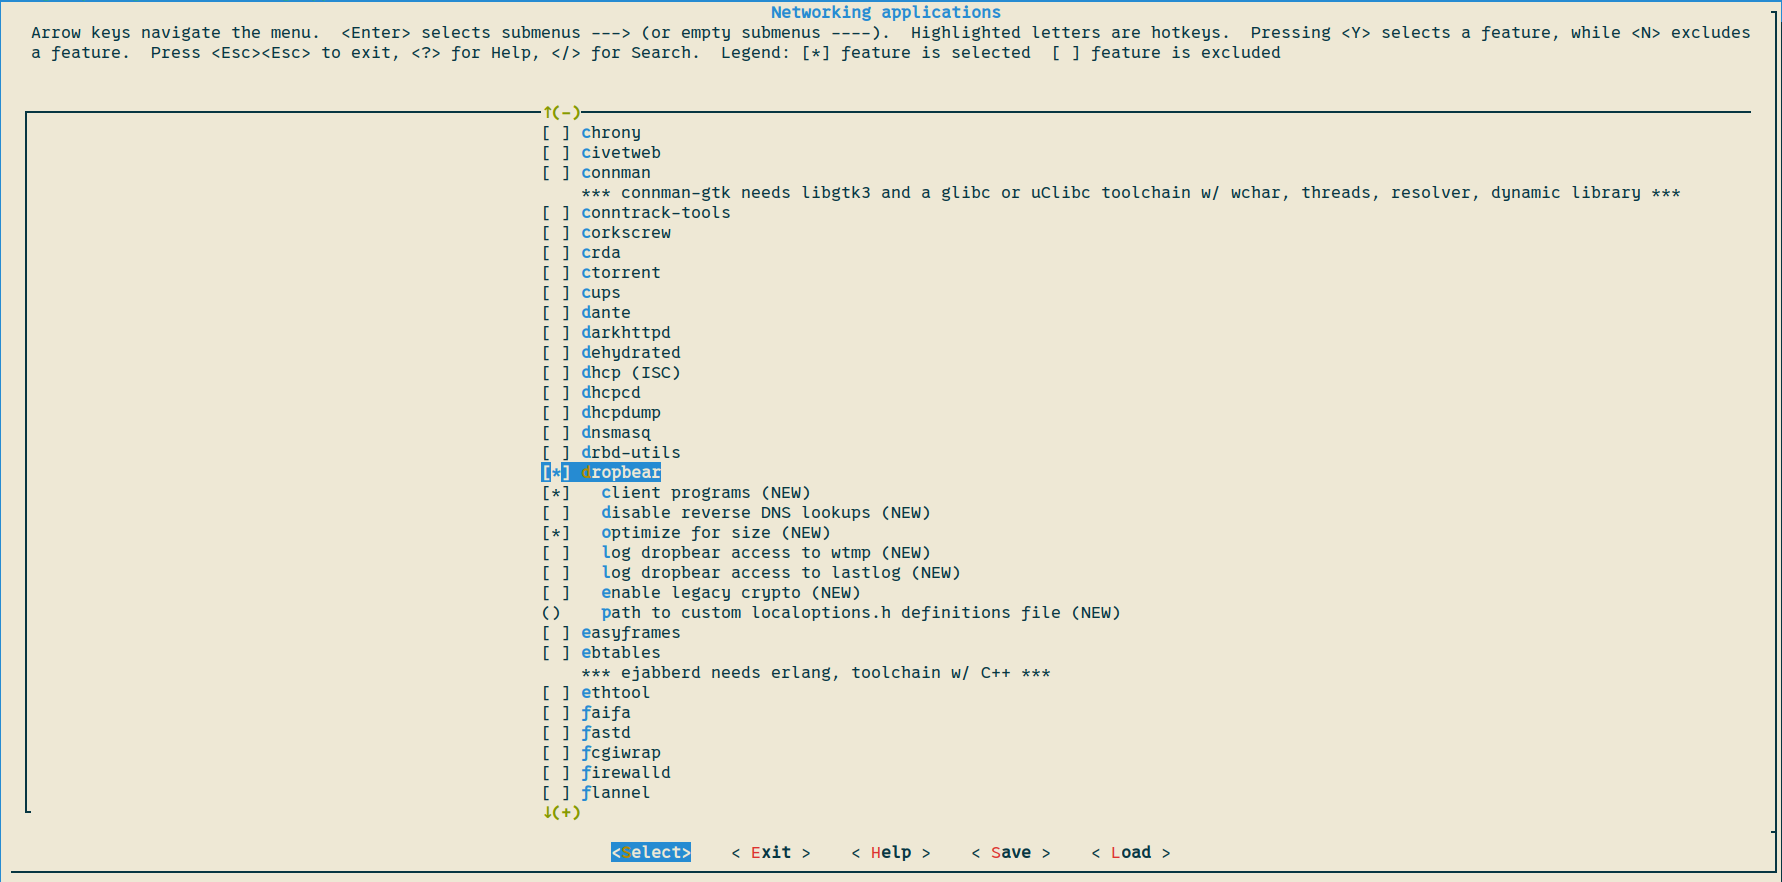 Dropbear in the buildroot’s GUI
This won’t be enough. The root user must have a password in order for ssh to work. It can be set in
System configuration > Root password.
However that won’t be a plug-and-play solution. Even after compilation the board would not obtain any IP address on which we can connect via ssh root@AA.BB.CC.DD. After the Ethernet line will be up, RPi would send DHCP requests to our computer and would not obtain any proper response, if you are not running a DHCP server on it of course.
They may be a lot of solution for this, including running own DHCP server on a host device, routing the packets to your router or providing IP manually on each startup. But there is a better and simpler solution for that.
In the same menu, find ifupdown scripts package and make sure it is selected. For my configuration it was enabled from the very start.
 Ifdown scripts in the buildroot’s GUI
Now head to System configuration > Root filesystem overlay and type overlay there. It will be the folder in which we can manually add files, like text or binaries, which will be then statically compiled with Linux.
Now lets create an overlay for our network interfaces. All RPis (with no extension boards), would only have one.
1
2
mkdir -p ./overlay/etc/network    # Inside the buildroot folder.
touch ./overlay/etc/network/interfaces
Then go to your favorite text editor and define something like so.
1
2
3
4
5
6
7
8
9
10
auto lo
iface lo inet loopback

auto eth0
iface eth0 inet static
address 10.0.0.1    # This address can be whatever you wish
netmask 255.0.0.0
network 10.0.0.0
broadcast 10.255.255.255
gateway 10.0.0.2
Don’t forget to also provide a proper netmask, network and broadcast addresses.
- Compile To compile just execute
makewith no arguments. It will take some time, maybe several hours or so. It is a whole Linux after all.
If the 6th step was made, you can also check if the compilation did successfully included the predefined
interfacesfile like so:
1
cat output/target/etc/network/interfaces
Flashing
To run an OS on RPi one have to copy it’s image to SD card. The Pi requires a micro SD one, so to write something on it from a host device, an adaptor, that usually comes with RPi in a pack, is necessary.
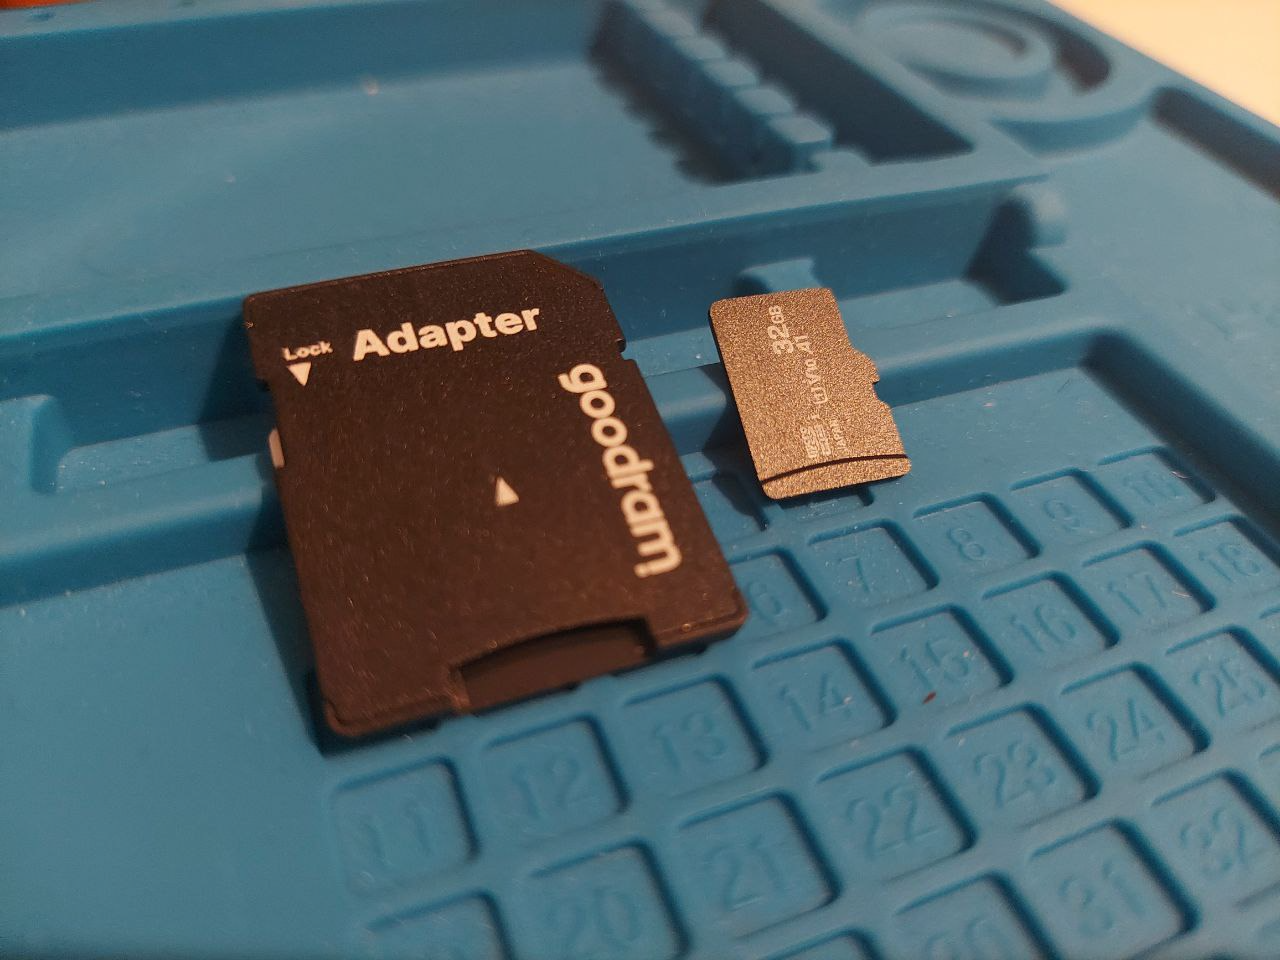 Example of a SD adapter
After plugging the SD into a slot it is important to unmount all partitions that it may had had before, because even the one that comes into a package with RPi is often supplied with Raspberry Pi OS pre-written.
If you have something like “Alcor Micro AU6625 PCI-E Flash card reader controller” on HP laptop like i do, don’t waste time fixing it because there are no working Linux drivers for it available online that would work with newer kernels. According to this the driver available on the master Linux branch
alcor_pci.cshould be working for 5.6 - 6.3 kernels, which are not the newest ones. There are no datasheets about this hardware anywhere, furthermore this existing driver was a result of reverse engineering. Until it is not compatible with newer kernels, one shall use Windows and some programs like balenaEtcher to write raw OS file into the SD, because of course Windows has working drivers for this magic box.
If a laptop does not have a SD slot or you don’t have an adaptor, probably buying a cheap SD-to-USB adaptor is way better. At least there would be zero problems with drivers this way, and the process will be the same as flashing an OS on a pendrive.
The SD reader controller is most likely to be found with
lspcicommand.
Use lsblk to find your SD card. It will probably named something like “mmcblk2”, but it is always a great idea to double check if it is a right one. The file needed will be located in output folder like so output/images/sdcard.img. Use dd to copy the content of .img file to the SD card:
1
sudo dd if=output/images/sdcard.img of=/dev/{your_sd_name} bs=1M
Connecting
At this moment a testing environment should be working properly. To control the RPi via a host device the following command would be used:
1
ssh root@10.0.0.1   # IP must be the one you've used.
It will ask for a password from the root account. Each command typed afterwards would work as if we were writing it on the RPi with plugged in keyboard. To swiftly copy output files to our target RPi, the scp command is useful.
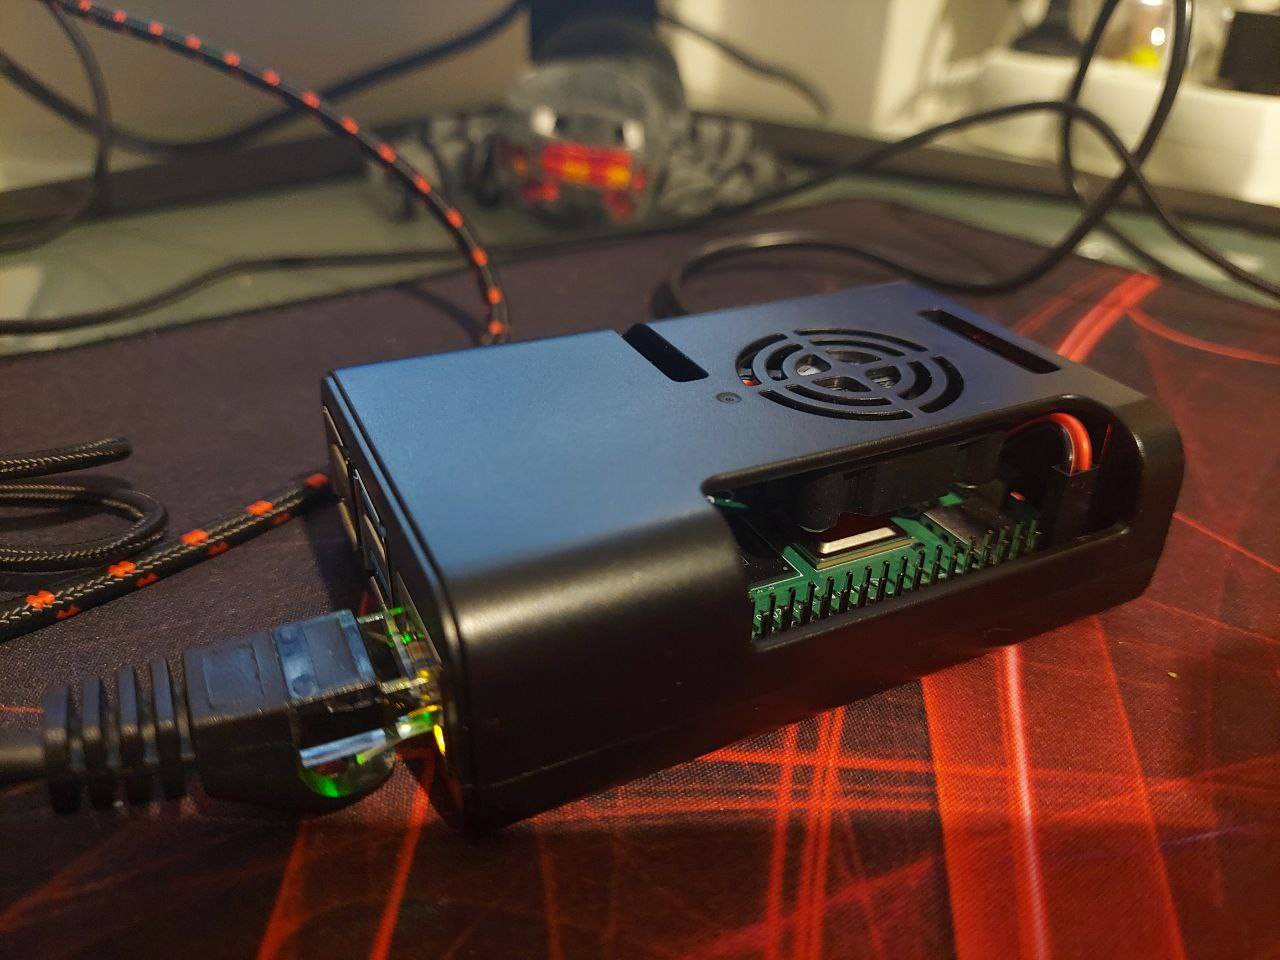 Raspberry Pi 4 B connected
Minimal Driver
A hello world driver must be done. It still will require some effort to properly cross compile the driver. Here is how a structure of starter driver’s source might look like:
1
2
3
4
5
.
├── compile_commands.json
└── src
    ├── driver.c
    └── Makefile
The
compile_commands.jsonfile is optional and provides compilation information to the LSP server. If you are using some IDE that does that for you automatically, then it can be ignored. This file was generated bybeartool. It is useful for handling code for different Linux kernel versions. Link to bear is here.
Makefile
The Makefile is put with source files because it is easier that way. Here is how it would look like.
1
2
3
4
5
6
7
8
9
10
11
12
13
14
15
16
# Makefile for driver compilation
obj-m += driver.o

# Target architecture
ARCH ?= arm64
# Compiler prefix.
COMPILER ?= aarch64-linux-gnu-

# Path to custom kernel headers.
KDIR := ~/buildroot/output/build/linux-custom/

all:
	make -C $(KDIR) M=$(CURDIR) ARCH=$(ARCH) CROSS_COMPILE=$(COMPILER) modules

clean:
	make -C $(KDIR) M=$(CURDIR) clean
A short review of what is happening here:
obj-m += driver.o- declaring which object output file we are expecting. The name should match the .c located in the same folder that this Makefile. In our case it must bedriver.c;
Multiple C modules are not allowed to add this way, because only one
.kodriver output file must be created. Multiple files support will be seen in next parts of this blog.
ARCH ?= arm64- basically the target’s architecture. For 32-bit onesarmmust be used;COMPILER ?= aarch64-linux-gnu-- this one is interesting one as only the prefix must be provided. To cross-compile for 64-bit ARM architecture theaarch64-linux-gnu-gccwould be used, so by stripping the gcc from the full name we are getting the prefix. For 32-bit targetsarm-linux-gnueabi-might be a possible option;KDIR := ~/buildroot/output/build/linux-custom/- This is a path to generated Linux headers2. The buildroot folder might be in a different place, so this must be adjusted.all- this Makefile rule would allow us to generate the kernel driver itself. By providing all symbols defined above the cross-compilation will be possible;clean- simply cleans all generated module files including the.kofile. Useful since many output files would be spawned in the same folder.
Driver Code
This is the driver’s code itself:
1
2
3
4
5
6
7
8
9
10
11
12
13
14
15
16
17
18
19
20
21
#include <linux/kernel.h>
#include <linux/module.h>

/* Environment initialization. */
static int __init rpfan_driver_init(void) {
	pr_info("%s: Fan driver properly initialized.\n", THIS_MODULE->name);
	return 0;
}

/* Unloading the module. */
static void __exit rpfan_driver_exit(void) {
	pr_info("%s: Fan driver closed.\n", THIS_MODULE->name);
}

module_init(rpfan_driver_init);
module_exit(rpfan_driver_exit);

MODULE_LICENSE("GPL");
MODULE_AUTHOR("notforest <sshkliaiev@gmail.com>");
MODULE_DESCRIPTION("Driver for optimizing raspberry pi's fan and configurating it from the user space.");
MODULE_VERSION("0.1.alpha");
Drivers must include an __init and __exit functions, which can be understood by an analogy of constructors and desctructors in OOP. For now they don’t do much, but soon enough there would be code snippets that do require a proper clean afterwards.
No user space libraries like the standard library is allowed here, so all included library must be from Linux headers.
It is a minimal kernel driver’s code, that just prints some messages when loading and unloading. Just for the first test, compile and export the driver to the target device:
1
scp driver.ko root@10.0.0.1:/root    # IP may be different.
Then within the Raspberry Pi we can test out the driver my loading and unloading like so:
1
2
3
4
5
6
7
8
9
insmod driver.ko
dmesg | tail -2

[  916.393994] driver: loading out-of-tree module taints kernel.
[  916.400299] driver: Fan driver properly initialized.

rmmmod driver.ko
dmesg | tail -1
[ 1108.600517] driver: Fan driver closed.
Print messages are working as intended so we can proceed to performing some upgrades.
There is a message that our driver taints the kernel. This is completely alright since this module is out-of-tree and considered as something foreign by the kernel. For now this is just a warning and nothing more.
To create some solid ground of being able to control the driver’s behavior, some simple I/O communication from the user-space must be added. A simple character device with it’s class should do the trick for most of the things. For this we should define our open, close, read and write functions.
Two new header includes must be added: linux/cdev.h and linux/fs.h. Before actual function implementations it is time to take care of some global variables and pre-processor symbols:
1
2
3
4
5
6
7
8
9
10
11
12
13
14
15
16
17
18
#include<linux/kernel.h>
#include<linux/module.h>
// New stuff
#include<linux/cdev.h>
#include<linux/fs.h>

#define KBUF_SIZE 4
#define DEVICE_NAME "rpifan"
#define CLASS_NAME "fan"

/**************** Driver data fields ****************/
static struct class *dev_class;
static struct cdev rpfan_gpio_cdev;
static struct file_operations fops;

char kbuf[KBUF_SIZE];
dev_t dev = 0;
/****************************************************/
Here the static struct class *dev_class is a pointer to our custom driver’s class, while the static struct cdev rpfan_gpio_cdev is a character device for our driver.
Rather than going into what is a class and what is a character device, it is easier to understand the purpose of each in this particular scenario:
- We have to create a character device, which is part of Linux API that provides us with an ability to store some data in form of a file.
- Meanwhile we also need to create a way to access this character device from the user’s space. For that we need our virtual class and register it with
sysfs.
For that it is time to add something useful into our __init function:
1
2
3
4
5
6
7
8
9
10
11
12
13
14
15
16
17
18
19
20
21
22
23
24
25
26
27
28
29
30
31
32
33
34
35
36
37
38
39
40
41
42
43
/* Environment initialization. */
static int __init rpfan_driver_init(void) {
     // RPi fan character device region.
    if(alloc_chrdev_region(&dev, 0, 1, DEVICE_NAME) < 0) {
        pr_err("%s: ERROR: Unable to allocate major number, aborting...\n", THIS_MODULE->name);
        goto _unreg;
    }

    pr_debug("%s: DEBUG: Major = %d, Minor = %d\n", THIS_MODULE->name, MAJOR(dev), MINOR(dev));
    cdev_init(&rpfan_gpio_cdev, &fops);

    // RPi character device driver for holding GPIO data.
    if(cdev_add(&rpfan_gpio_cdev, dev, 1) < 0) {
        pr_err("%s: ERROR: Unable to add the character device for raspberry pi fan.\n", THIS_MODULE->name);
        goto _cdev;
    }

    // Creating a class for user-space access.
    if(IS_ERR(dev_class = class_create(THIS_MODULE, CLASS_NAME))) {
        pr_err("%s: ERROR: Unable to create the structure class.\n", THIS_MODULE->name);
        goto _class;
    }

    // Spawning the device so it will appear under /dev/rpifan
    if(IS_ERR(device_create(dev_class, NULL, dev, NULL, DEVICE_NAME))) {
        pr_err("%s: ERROR: Unable to create the device.\n", THIS_MODULE->name);
        goto _dev;
    }

	pr_info("%s: Fan driver properly initialized.\n", THIS_MODULE->name);
	return 0;

_dev:
    device_destroy(dev_class, dev);
_class:
    class_destroy(dev_class);
_cdev:
    cdev_del(&rpfan_gpio_cdev);
_unreg:
    unregister_chrdev_region(dev, 1);

    return -1;
}
In the code we firstly allocate some memory region for our character driver with alloc_chrdev_region, then registering a character driver: cdev_add. To gain access from user-space we have to create the class and spawn a new device under this class by calling class_create and device_create. After all that, if everything was successful, we can observe a new device under /dev/{DEVICE_NAME}.
It is important to clean everything in the opposite order if something goes wrong. For that using labels is a very convenient way to unwind each part one by one.
Even if everything would go fine, our driver still must clean everything on unloading. So the __exit function must also do the cleaning, however it is very important to not mess up the order.
1
2
3
4
5
6
7
8
/* Unloading the module. */
static void __exit rpfan_driver_exit(void) {
    device_destroy(dev_class, dev);
    class_destroy(dev_class);
    cdev_del(&rpfan_gpio_cdev);
    unregister_chrdev_region(dev, 1);
    pr_info("%s: Fan driver closed.\n", THIS_MODULE->name);
}
Before writing or reading from the file, it must be opened and then eventually closed. Even though this driver requires no additional logic during these manipulations, we still have to define functions, even if they would be totally empty:
1
2
3
4
5
6
7
8
9
10
11
/* Character device open. */
static int rpfan_open(struct inode *inode, struct file *file) {
    pr_debug("%s: Configuration file opened.\n", THIS_MODULE->name);
    return 0;
}

/* Character device closed. */
static int rpfan_release(struct inode *inode, struct file *file) {
    pr_debug("%s: Configuration file closed.\n", THIS_MODULE->name);
    return 0;
}
Now the read and write functions. Here our buffer char kbuf[KBUF_SIZE] would take place. Main functions here are copy_to_user and copy_from_user, which would just copy data from user space to our buffer and the other way around.
1
2
3
4
5
6
7
8
9
10
11
12
13
14
15
16
17
18
19
20
21
22
23
24
25
26
27
28
29
30
/* Reading the current data configuration. */
static ssize_t rpfan_read(struct file *file, char __user *buf, size_t size, loff_t *off) {
    ssize_t len = min(KBUF_SIZE - *off, size);

    if(copy_to_user(buf, &kbuf + *off, len)) {
        pr_err("%s: Failed to provide config data to the user.\n", THIS_MODULE->name);
        return -EFAULT;
    }
    pr_debug("%s: Data read succesfully: %s\n", THIS_MODULE->name, kbuf);

    *off += len;
    return len;
}

/* Writing new configuration to the character device. */
static ssize_t rpfan_write(struct file *file, const char *buf, size_t len, loff_t *off) {
    if(len > KBUF_SIZE) {
        pr_err("%s: Invalid data size\n", THIS_MODULE->name);
        return -EINVAL;
    }

    // Receive new data from user space.
    if(copy_from_user(&kbuf, buf, len)) {
        pr_err("%s: Failed to recieve configuration from the user.\n", THIS_MODULE->name);
        return -EIO;
    }

    return len;
}
Just defining those functions won’t do the trick, because we must pass it to Linux kernel when creating a character driver.
In fact it does getting passed here cdev_init(&rpfan_gpio_cdev, &fops); and the fops is a structure that simply consists all pointers to previously defined functions.
1
2
3
4
5
6
7
static struct file_operations fops = {
    .owner          = THIS_MODULE,
    .read           = rpfan_read,
    .write          = rpfan_write,
    .open           = rpfan_open,
    .release        = rpfan_release,
};
Compile a new version and check out how the character driver would work:
1
2
3
4
5
6
7
8
9
10
11
insmod driver.ko
echo 1 > /dev/rpifan
cat /dev/rpifan
1
echo wow > /dev/rpifan
cat /dev/rpifan
wow
echo 9999 > /dev/rpifan    # Our buffer is only 3 characters long
sh: write error: Invalid argument
dmesg | tail -1
[  778.494152] driver: Invalid data size
The driver works perfectly fine and performs all what we defined. The buffer would only hold 3 characters, because it is enough to provide all values from 0 to 255 in written form, which then will be used to select required GPIO and PWM mode.
The
KBUF_SIZEis defined as 4 in the code, which makes perfect sense becauseechocommand, as well as most others would add a null character'\0'to the end of it, which is why when we try to write9999to it, the additional null character would cause a total size of 5 characters to be written.
For now this driver does not control any actual hardware part, but this start must be done before actually implementing the logic itself.
In the next part, a GPIO support will be added. The driver would be able to initialize a free GPIO pin when being loaded and be configurable from character driver defined previously.
Read more
Footnotes:
By independent i only mean that we aren’t going to use any software that is specific for Raspberry Pi OS, for example when implementing a PWM control, to change the PWM channels, one can provide
dtoverlay=pwm-2chaninto/boot/firmware/config.txtinside the OS in real time. That is very easy but we are going to also do it in real time without ever needing the help of Raspberry Pi OS. ↩︎Basically this folder contains the complete source code and necessary files for the custom Linux kernel, including architecture-specific code, kernel modules, file systems, core, libraries, and the Makefile that controls the build process. When you use
make modulesin this folder, it performs cross-compilation using a custom specified toolchain to build kernel modules compatible with your custom Linux environment. ↩︎
Comments powered by Disqus.